The mighty DR650 gets a new shoe (and other farkles)

The sheer power of the mighty DR650 means that tyres don’t last long..
Ok, thats a total lie, it only has 40bhp, but after a year and maybe 10,000km on and off road, the rear tyre was shot and it was time for a new one.
One of the things I need to be able to do is fix a flat when I’m off on one of my adventures, so I thought I’d kill 2 birds with one stone – change the tyre myself so I could practice the procedure for getting the wheel off and fixing a puncture.
Now in theory, a motorbike is exactly the same as my mountain bike.
Disk brake, chain, knobbly tyres, inner tube. So it was going to be easy, right?
Ha!
So the rear was pretty worn – some of the knobbles were worn right off the centre and even beginning to tear off. I’m pretty happy with how long this tyre (Bridgestone TW302) lasted and it’s overall performance on and off road was pretty good for my purposes. Knobbly tyres are never brilliant on on the tarmac on the road, but these did ok with the appropriate caution.

First I had to buy a new tyre – I picked up a Pirelli MT21- which are more dirt oriented than the TW302’s but they aren’t as full on as the Dunlop 606’s which a lot of people use on these bikes. We shall see! I also picked up a new heavy duty inner tube and new tyre iron to help get the old one off.

I also picked up a hydraulic lift so I can get the bike off the ground to remove the wheel, but it will also be useful for other maintenance like chain oiling and oil changes.

Was pretty difficult to get the lift under the bike as it’s maybe 3cm taller than the bottom of the bashplate, so I had to lever the bike onto it using the sidestand and sliding it under as the bike was tipped up. But it wasn’t too hard and soon the bike was balanced off the ground.

I took the wheel off and made sure the bolts were laid out in the order they came off.
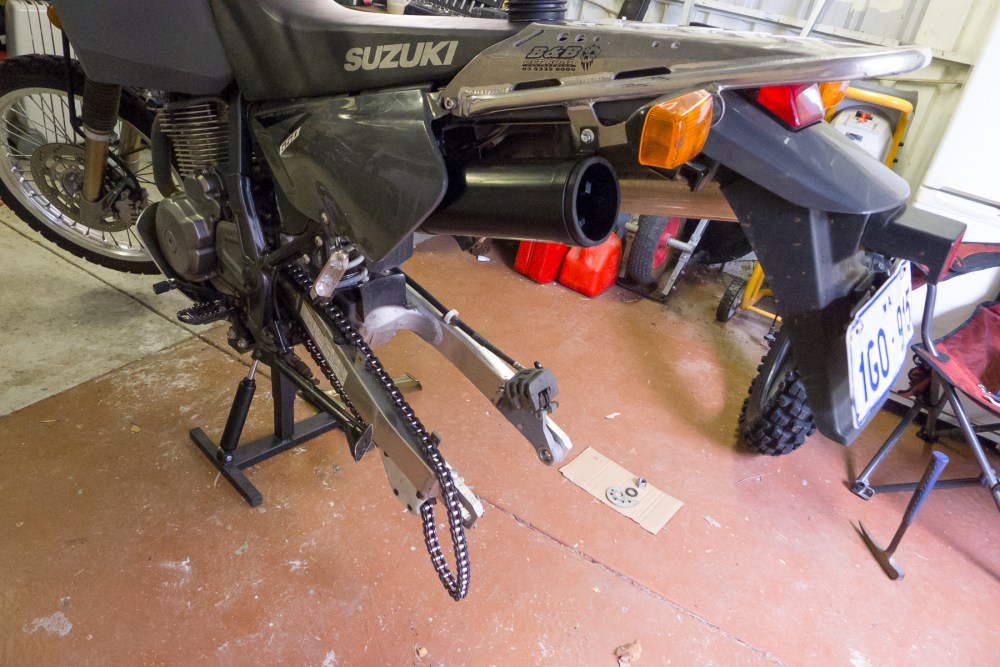
The wheel-less steed.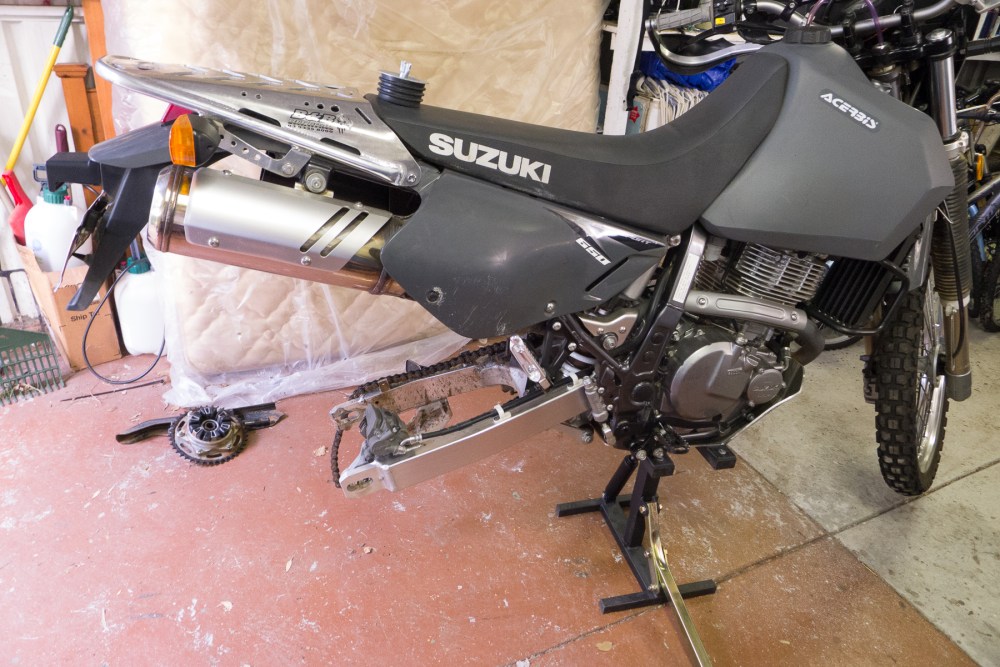
I popped the sprocket off the wheel so I could inspect the cush drive rubber. All good, a little slack, but not a problem – I’ll replace them at the next service in another 4000km.

On to the tyre! Oh man this is was so hard. Breaking the bead was pretty easy – lever it off with the tyre irons and work tyre down until it’s off. But levering the tyre off the rim was almost impossible. Mostly because the bead wouldn’t stay off the lip and kept reseating itself, which meant the tyre wasn’t going anywhere.
I rested the wheel on the new tyre and even enlisted the help of a friend, but no dice.

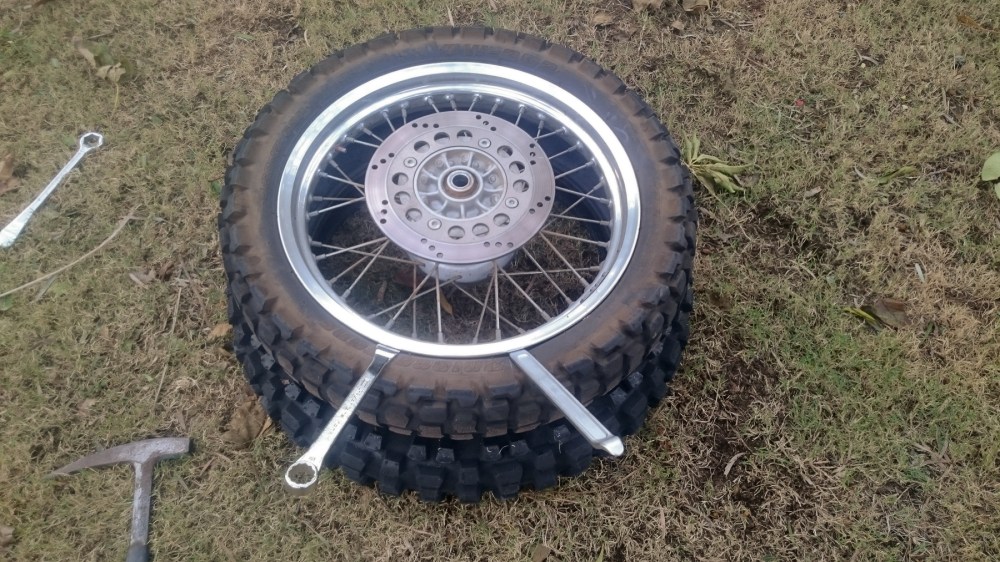
Eventually, and just before dark on Sunday – I gave it ‘one last shot’ – keeping the bead down with my knee and levering the tyre on the opposite side and boom – off it came. Hurrah!
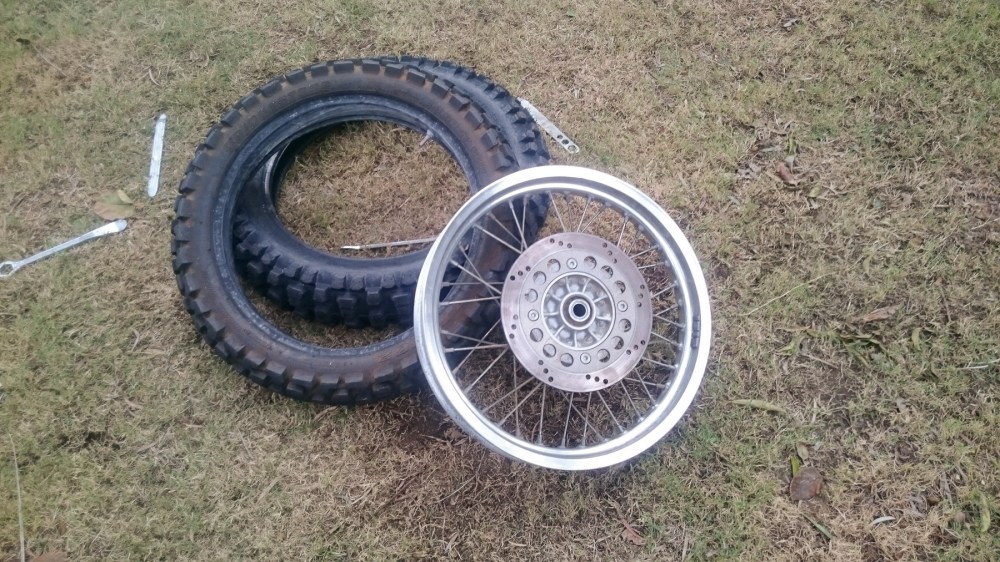
Getting the new tyre on was pretty easy, but I ended up pinching the inner tube getting the tyre onto the rim. Crap! So much for my learning experience then!

Fast forward a week and the tube was repaired, I’d fitted the wheel back onto the bike (not without some hassle – it’s a bloody pain in the arse keeping all the spacers and shit on the wheel whilst you try to get the disk into the callipers and the thing aligned. Eventually it’s all good.

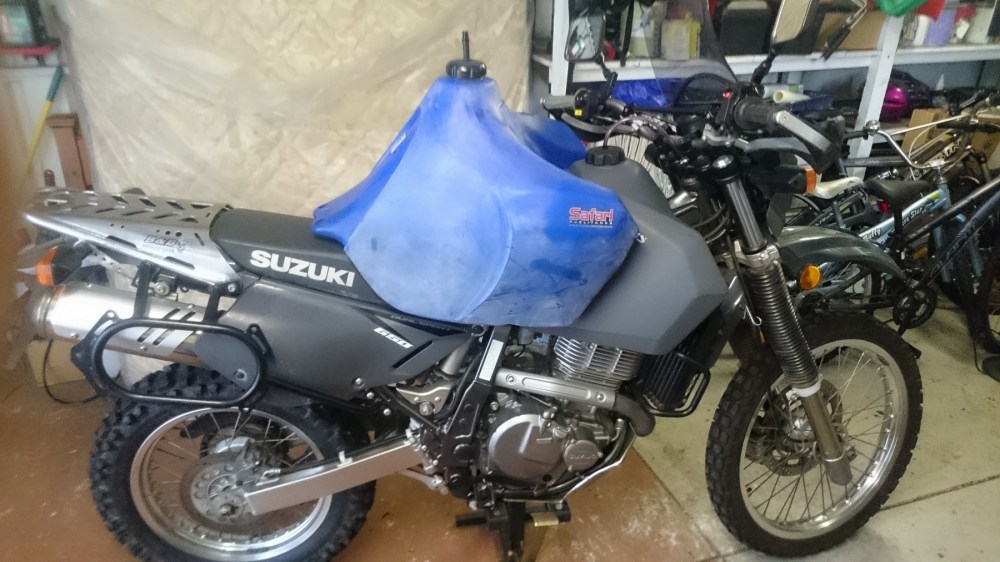
I picked up some pannier frames and a safari fuel tank from Gumtree – saved myself at least $600 over new, which is cool as both of these things I need in order to get my bike set up for adventure travel. The guy did have some awesome panniers, but they had already been sold – dammit!
Anyway, I fitted the pannier frames – I had to improvise with the bolts and spacers as I had a different top rack to the guy I bought it from, but it ended up ok. I need to buy some threadlock for the bolts before I ride off into the desert so nothing comes undone.

The last thing was a giant 30l (or is it 33l) safari fuel tank. It’s completely the wrong colour, slightly beaten up and unstylish, but I dont care – out in the desert, fuel is more important than looks! I would spray paint it, but the plastic is slightly porous to let fuel vapour escape, so paint would blister and look even worse than the blue. Hey ho.
I’ll only fit it when I’m getting ready for a ride where I need the capacity – for the moment, my current 20l tank has about 400km (250 miles) range before reserve, which is more than enough for most rides and stops between petrol stations.
So the next job is to sort the suspension – it needs work – heavier springs and heavier weight oil, plus new values and rebound damping will be needed it I load the bike up with fuel and gear. It needs sorting now with my regular riding to be honest, but it won’t cut it for a loaded bike. I’ll get that lined up when it goes in for it’s next service.

like
LikeLike
Oh, I feel your pain!
I didn’t experience a single flat over the course of 10k km’s, then in a single day I had three… In the searing heat of the NT desert at that!
Cheers,
Al
LikeLike
Hey Al – I was not prepared for how damn hard the tyre was to get off the rim. I bruised my palms black and blue trying to do it 😦 I’m planning to get a plastic J clamp to hold the bead down – be light enough to carry out in the bush I think. The bead buddy I have worked well getting the tyre back on again.
3 flats in a day would be so disheartening! I’m going to get some of that green goo stuff that goes in the tube so small punctures will self seal – I can’t imagine repeating the process 3 times in the desert! I think I’ll get a centre stand as well to make things a bit more civilised!
LikeLike
Sounds painful! Luckily the process was somewhat easier as I was simply breaking the bead and slipping a single side off to put a new tube in. I too pinched my first spare tube, and then the second (ran out of rear tubes and tried to use a front in the rear — which worked about as well as you’d expect) and then finally got it right. Certainly a testing day! Didn’t cover much ground, but it was good to learn the ins and outs of the rear setup.
I really should carry a puncture repair kit as they’re getting pretty good these days. I’ve also been reading about tubeless setups, but they’re still a bit expensive for my application at the moment.
LikeLike